Setting Up Categories
Categories for your Online Ordering System allow you to organise your menu items into clear, structured groups (e.g., Starters, Mains, Desserts, Drinks). Setting them up properly makes it easier for customers to browse your menu and improves their ordering experience.
Accessing Categories
- Log in to your Admin Panel.
- From the side menu, go to Menu & Items > Categories.
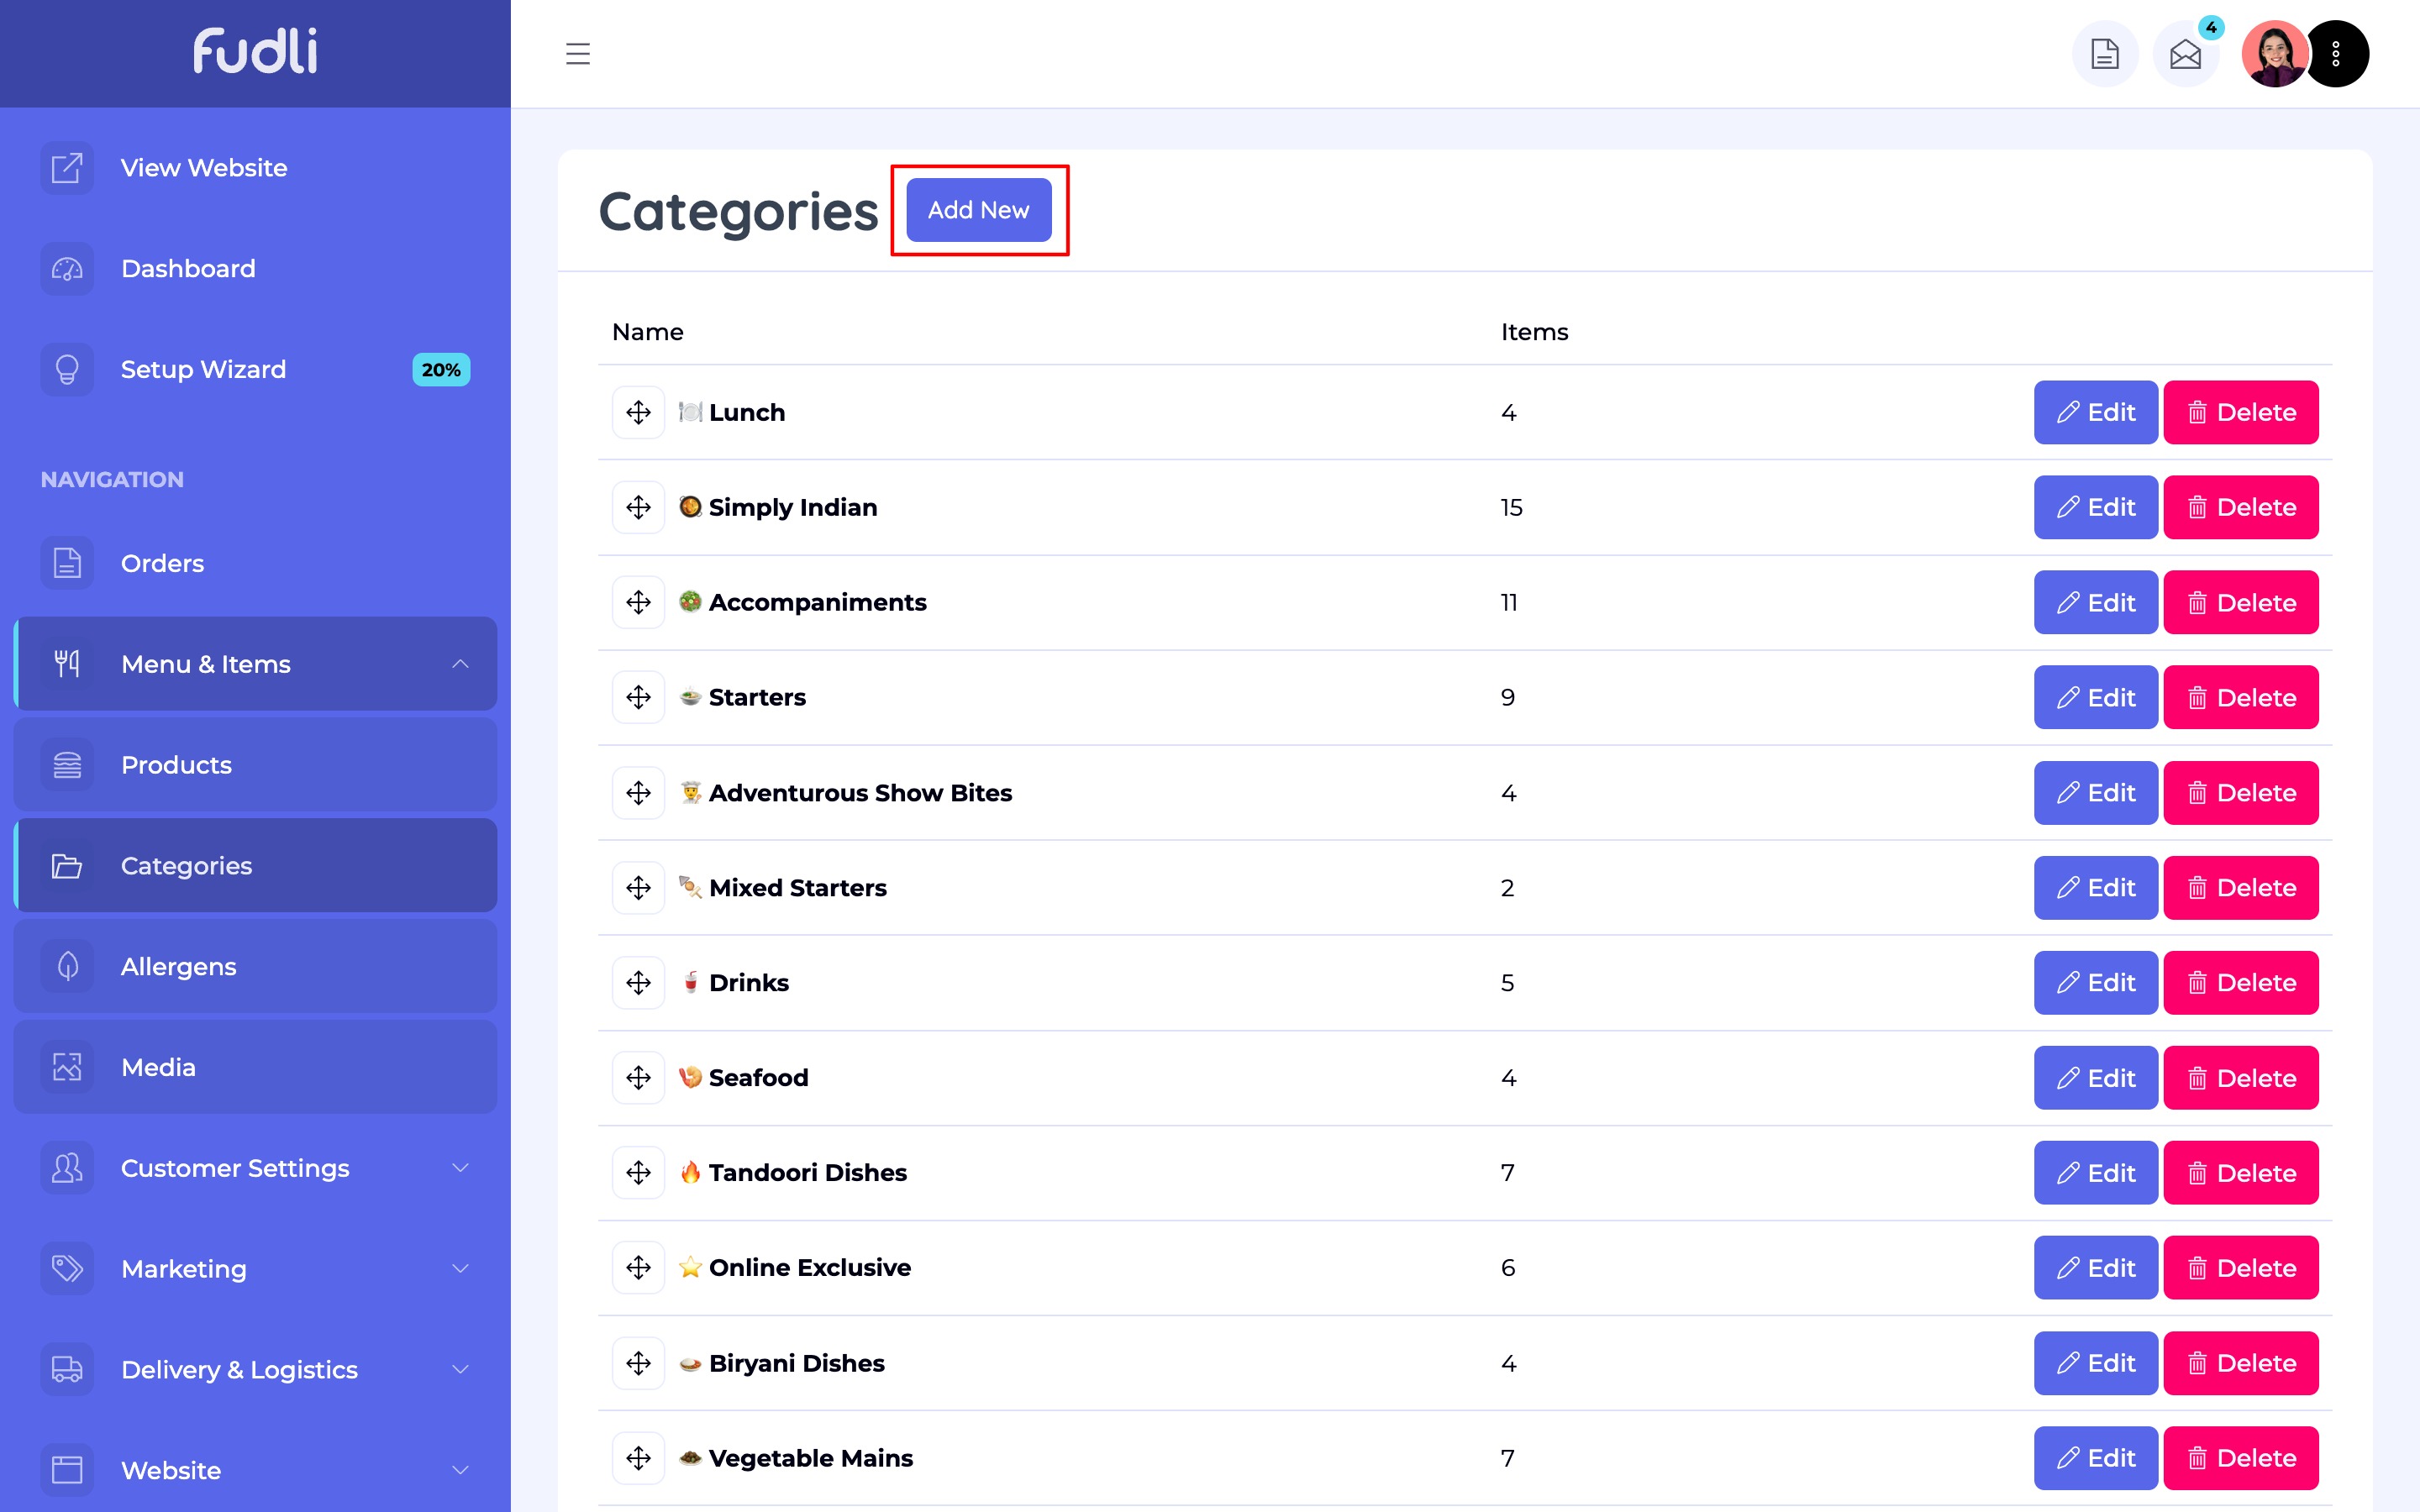
Adding a New Category
Here, you’ll see a list of your existing categories and an option to create new ones.
-
Click the Add New button.
2. Enter a Category Name (e.g., “Pizzas,” “Burgers,” “Lunch Specials”).
- You can also add emojis to make the category more engaging. For example, 🍕 for pizzas or 🥗 for salads.
- To find emojis, visit Emojipedia, copy your desired emoji and paste itinto the category title.
3. Once finished, click Save to create your new category.

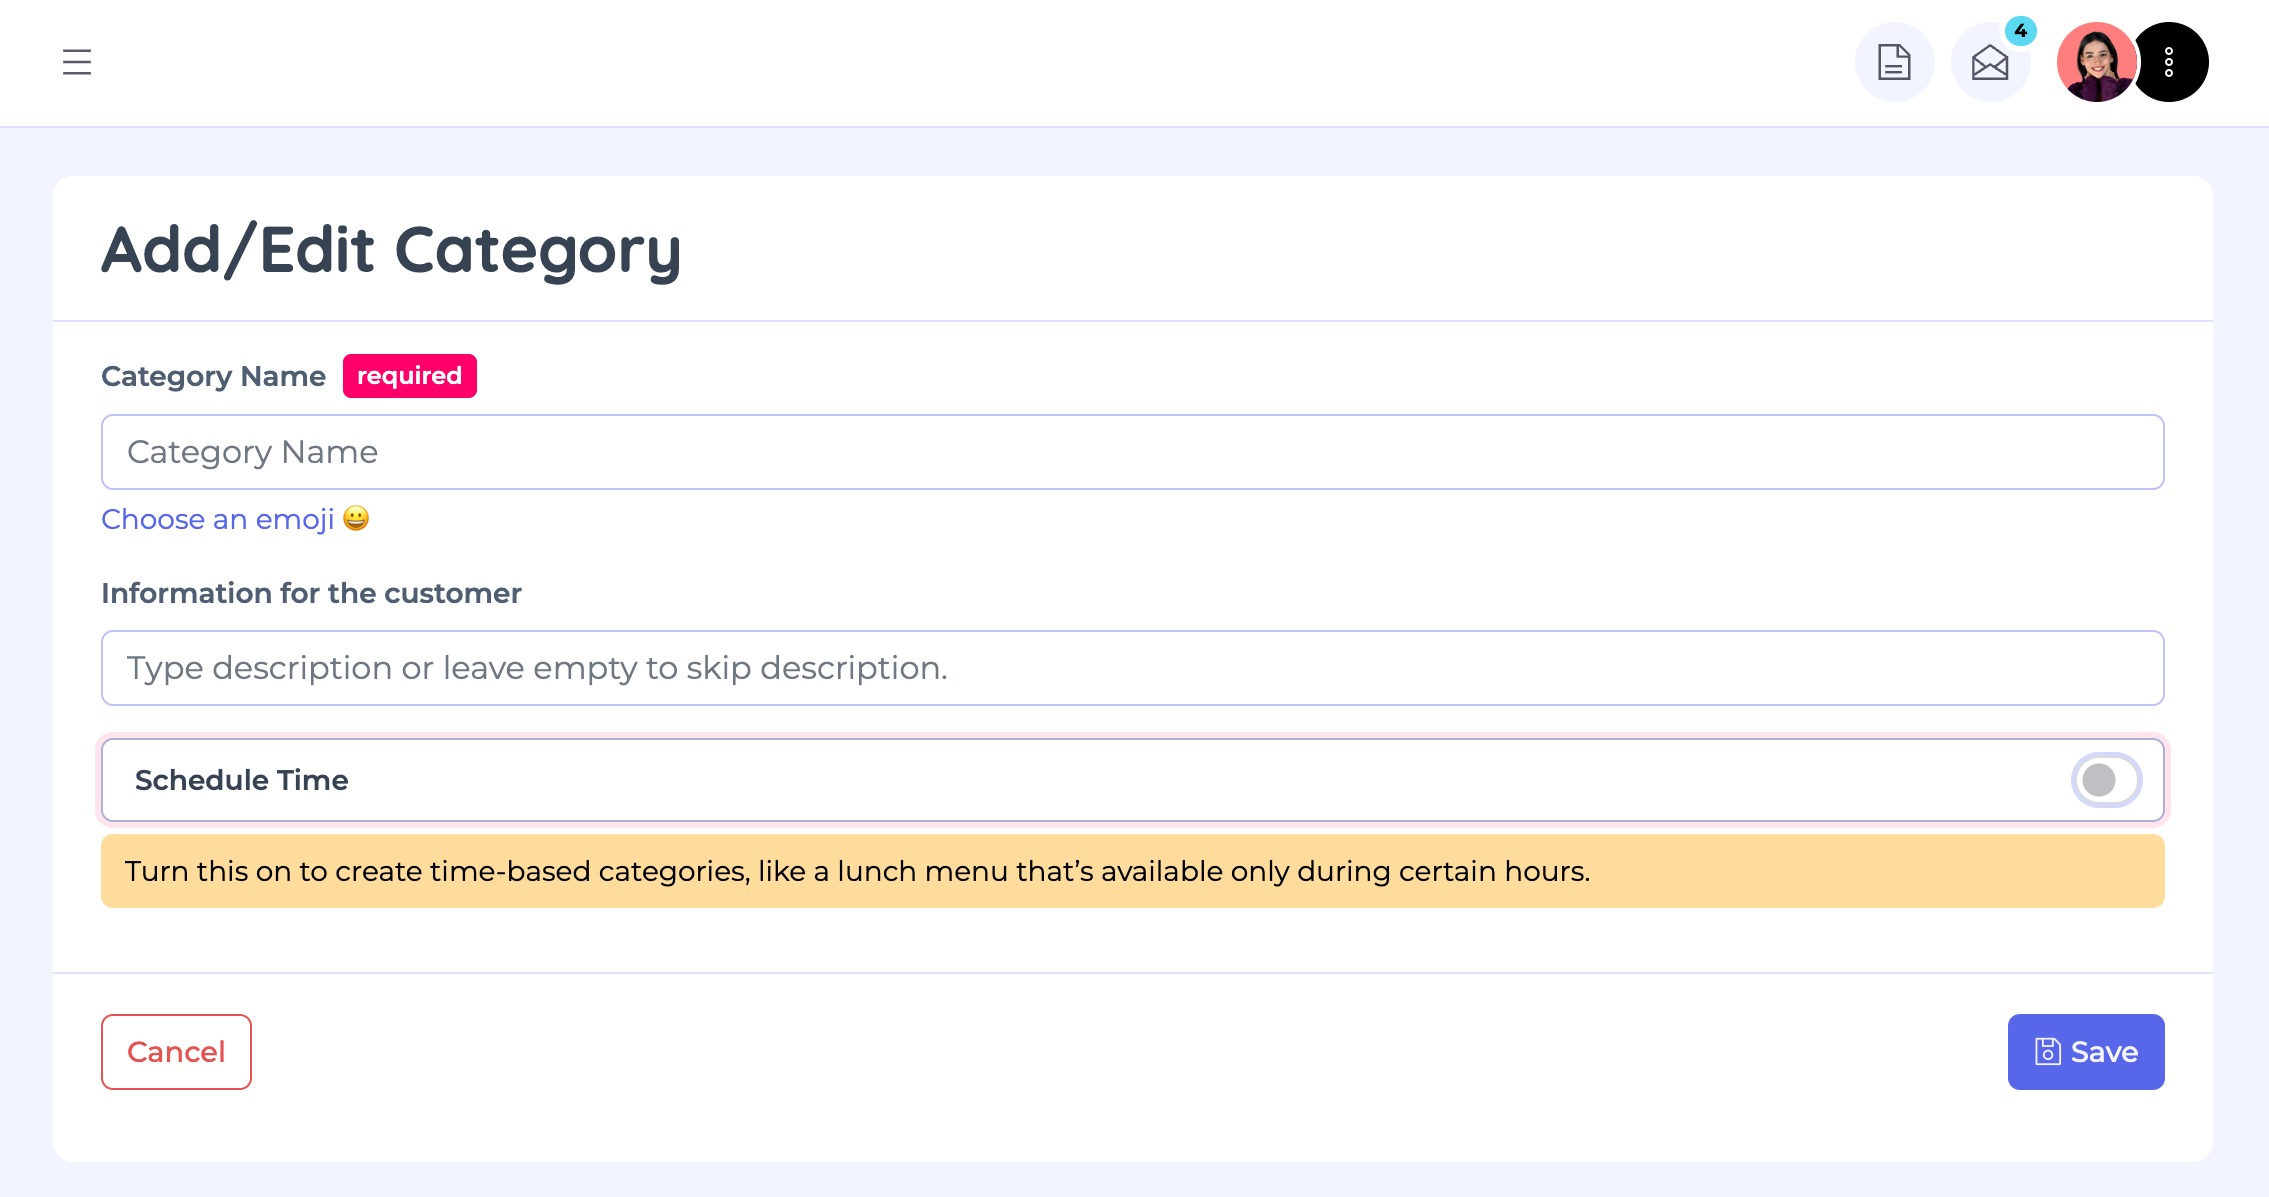
Scheduled Time Categories
If you want certain categories to be available only at specific times (such as breakfast, lunch or happy hour), you can enable Scheduled Time Category.
- When this option is turned on, you’ll be able to set a Start Time and End Time for the category.
- Example:
- A Lunch Menu category available from 12:00 PM – 3:00 PM.
- A Weekend Specials category available only on Saturdays and Sundays.
Any items placed within this category will only appear and be available for purchase during the defined schedule.
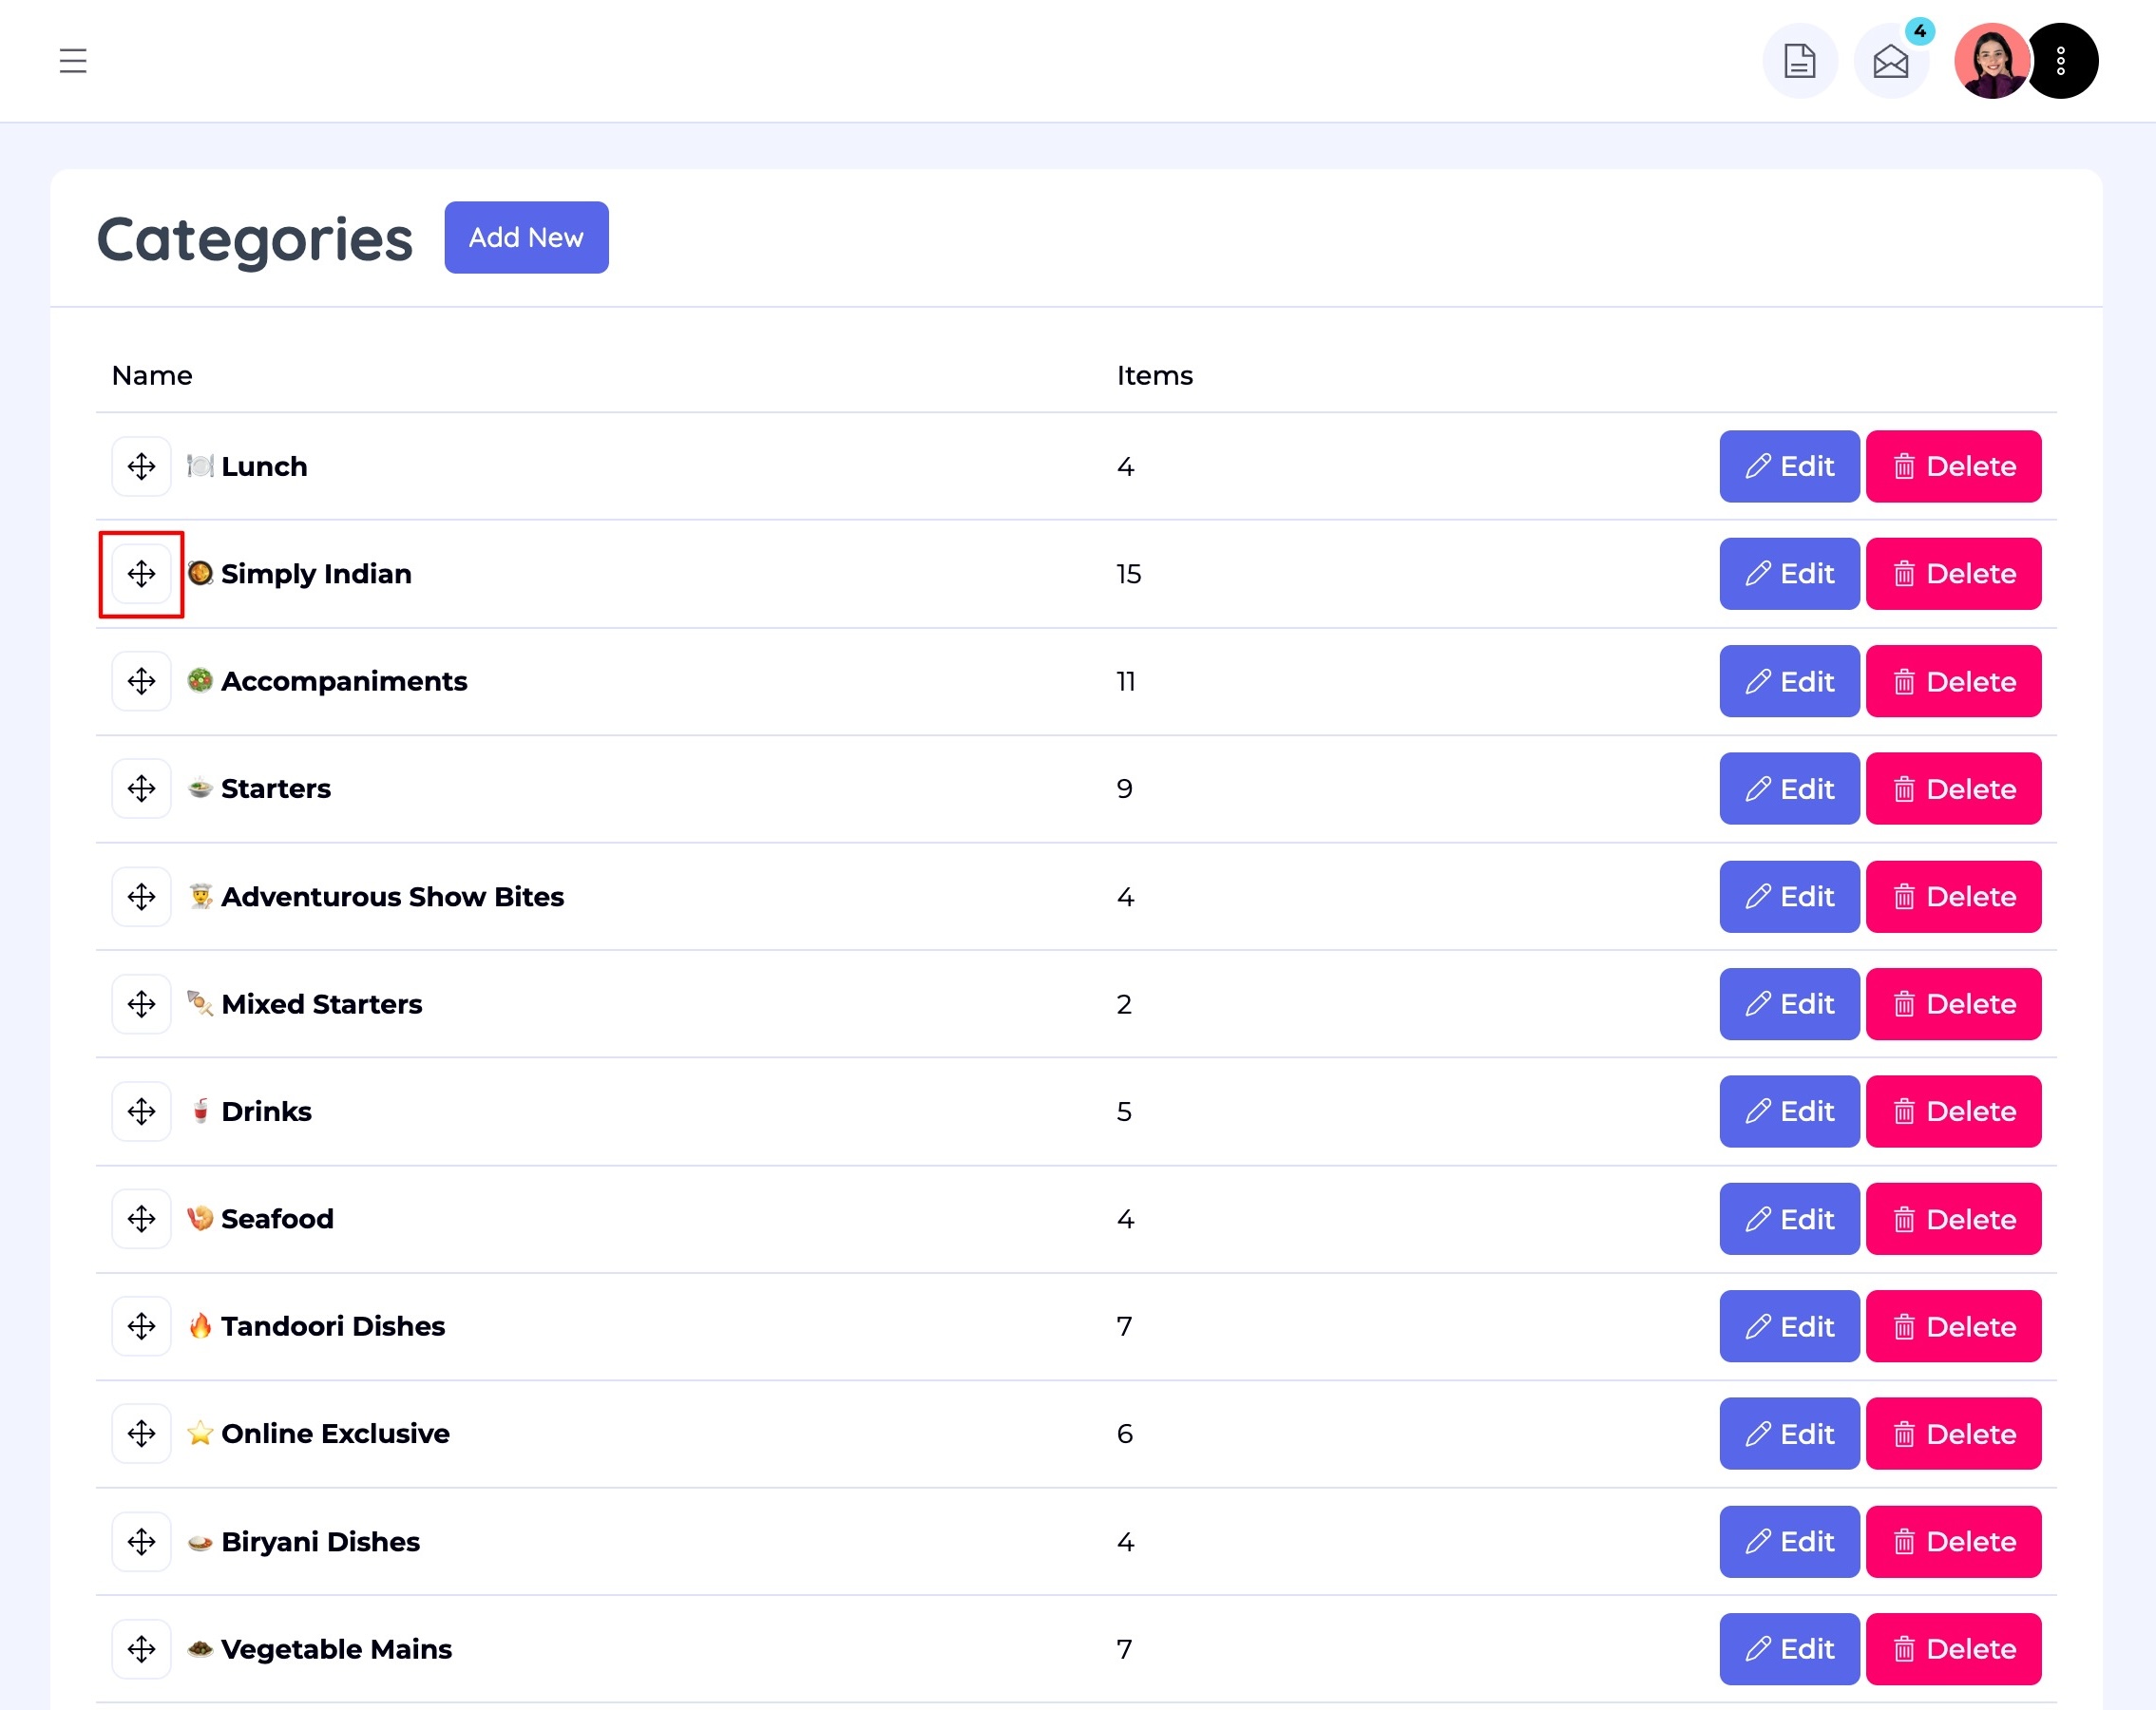
Reordering Categories
To control the order in which categories appear on your online menu:
- Locate the drag-and-drop tool next to each category in your list.
- Click, hold and drag the category into your desired position.
- Release to save — the system will automatically update the order.
This ensures your most important or popular categories are displayed first to customers.